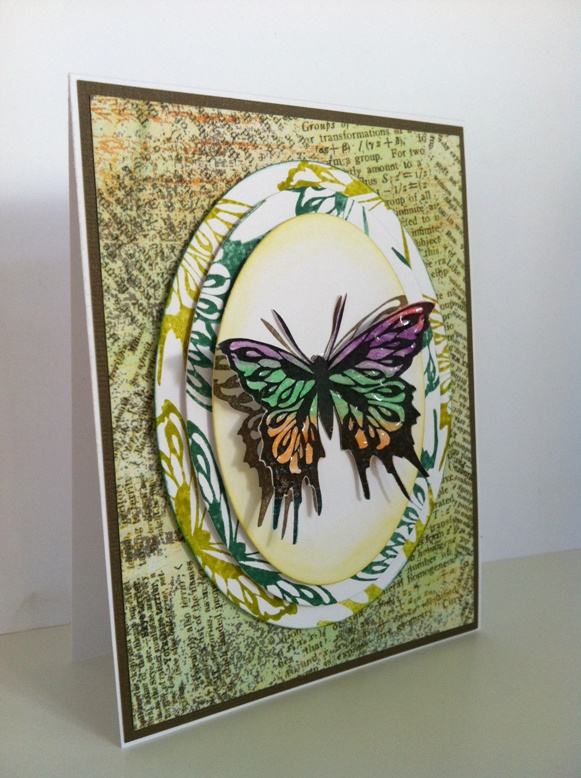
For my card I started off with 3 ovals (Spellbinders Classic Ovals Small). I used the three middle sizes and cut a white oval with each. I stamped bits of the butterfly around the edges and in the top oval, I stamped most of the image complete. It doesn't matter that it goes off-edge since a dimensional butterfly is going to go on top:

Here's the assembled card (using 3D dots for all layers except the dimensional butterfly which is just glued with some normal liquid glue on the body).
Stamps used:
Bold and Beautiful (GinaK Designs)
Inks used:
Tim Holtz Distress Inks: Crushed Olive, Pine Needles
Memento: Tuxedo Black, Rich Cocoa
Paper:
Basic Grey "out of print" (it was shaded with Pine Needles distress ink to make it less yellow and more green)
Tim Holtz Distress Paper: Frayed Burlap
For More on Pyramage, here's another tutorial that is more complicated: http://www.papercraftjunkies.com/content/2009/02/pyramage-tutorial/
Or just GOOGLE :D
I'd like to enter this card into:
http://lawnscaping.blogspot.com/2012/02/lawnscaping-challenge-28-distress-mania.html
http://shellysimagesblog.blogspot.com/2012/02/2-16-terrifically-thrilling-thursday.html


oh my goodness... This is absolutely GORGEOUS! I love how you made this card. Thank you for the directions and illustrations! And thanks for joining us at Lawnscaping!!!
ReplyDeletePragtig! Wonderful way of getting "matching paper" by layering stamped butterflies!
ReplyDeleteThis is awesome.. love how you did this with the butterflies.
ReplyDeleteThis is AMAZING! I love how you colored the butterfly- Thanks so much for sharing this. Im stealing!!!
ReplyDeleteHugs!
WOW this is fabulous ... I'm going to give it a try RIGHT NOW!!! Really!!
ReplyDeleteThanks so much for joining our "ANYTHING GOES" challenge at Shelly's Images! Please come back and join us again real soon!!
Darlene
Shelly's Images DT
DAR’S CRAFTY CREATIONS
Oh, what a pretty butterfly. SO gorgeous!
ReplyDeleteJust wanted to stop back and let you know that you truly inspired me with this creation and I have used your inspiration for my own creations today. If you'd like to take a peek, pop over to my blog HERE. Thanks so much!
ReplyDeletebeautiful work!!! Thanks for the pictures on how to do it!
ReplyDeleteYour card is gorgeous! Thanks for sharing this cool technique.
ReplyDeleteBRAVO!!!
ReplyDeleteBeautiful work! Thanks for sharing this cool technique.
What a super idea
ReplyDeletekitten - Shelly's team
Hi, Popped over from Dar's Crafty Creations to see this cool technique. Thanks for sharing. I love your card!
ReplyDeleteWow this is gorgeous! I'll have to add this to my "give a try" list! Thanks for the idea ;)
ReplyDeleteWhat a beautiful card. I love the butterfly effect.
ReplyDeletethis card is wow, just stunning!
ReplyDelete