Wednesday, August 31, 2011

Masking with "victorian distress" background

For the delightful Anything Goes at Simon Says Stamp!

This card was made using two techniques: Masking (to close off an area to be left clear or filled later) and "victorian distress". Victorian distressing can also be seen on stamptv.com HERE.

Take a piece of scrap cardstock and cut an oval (or shape of choice) from it:
(Grid in cm's)
 Place this mask on your cardstock where you want to keep it clear:
 Stamp your image over the cardstock taking care NOT to move the mask. I stamped the butterflies with Tim Holtz Antique Linen.
 Now use a foam applicator and rub the same distress ink over the cardstock. Hold on tight to the mask (if you didn't adhere it temporarily with a temporary adhesive).
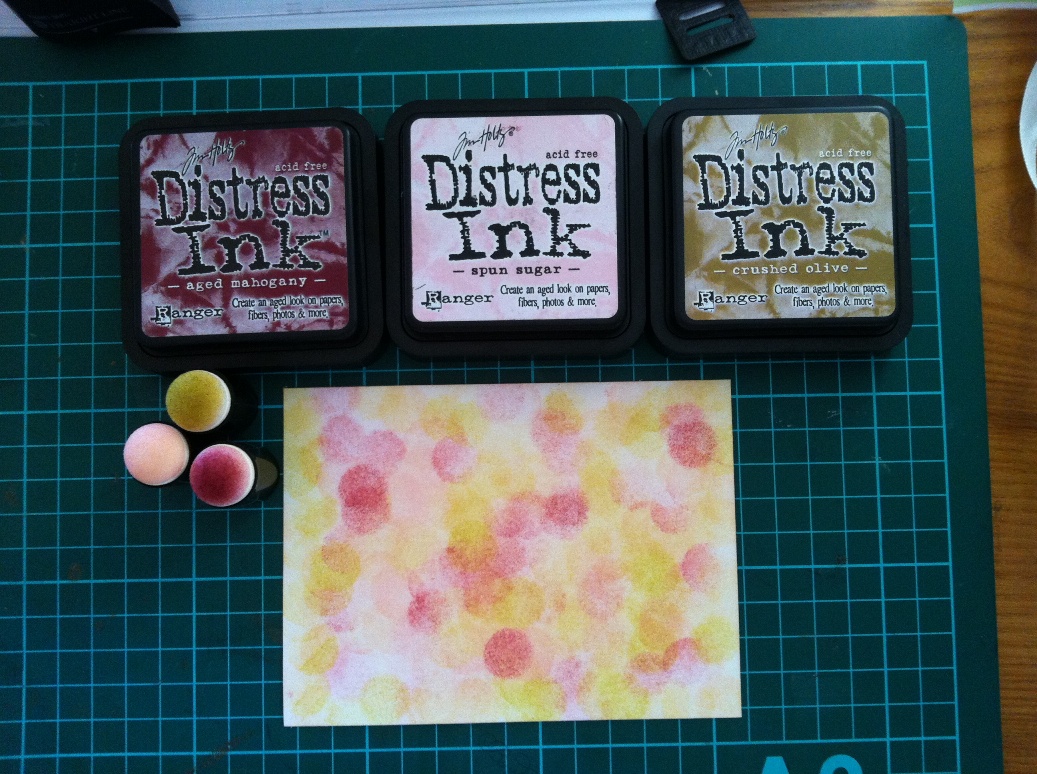
Take a second fitting distress ink (I used Spun Sugar) and go lightly over the same areas to cover any open spaces.
NOTE: When I did this the first time I used a light hand with the first DI but I accidentally dropped an dewdrop ink pad on it and had to re-do it. The second time I spread the DI quite darker that's why the masked area appears brighter on the final card above. (I didn't mind too much, practise makes perfect.)

Stamp a central image in a darker contrasting color in the middle. I used London Fog (see final card).
Rub a darker ink along the edges:
I always use my stamp-a-ma-jig when I do my sentiments and stamped this in London Fog ink (same as the central butterfly.
Lastly I stamped the same butterfly on colorful paper and cut it out, glued the centre to the shadow of it and lifted the wings to give dimension.
I glued the focal piece to orange cardstock, put the ribbon in place and glued to my card base.

Butterfly stamp: GinaK designs "Enjoy the Sunshine"
Sentiment: GinaK designs "Fanciful tags"

Exciting blog candy coming soon!!!

I am busy evaluating a very exciting software program that allows you to create digital "paper" craft pages! This includes beautiful digital paper that you can print out and use in your conventional paper craft projects. If all goes to plan I'll be able to give away a copy of this software to a lucky winner on my blog!! How is that for awesomeness!

So keep your eyes peeled!

Tuesday, August 30, 2011

e-Invite using My Memories

The invite below was created using electronic imaging from the fantastic My Memories website's free kit! They also have fantastic software that makes creating digital scrapbook and other type of pages fun and easy.

The background, frame and embellishments are all from the Loving You 2 kit. I put it together using Powerpoint and then saved it as a JPG image. Since my birthday is coming up I'm going to use this as my invitation!

Tonic paper trimmer / guillotine

I am SO excited to get my Tonic paper trimmer / guillotine today! It's sort of an early birthday present *grin*.
And it works fantastic!! I just need to get used to the placement of the paper and reading the rulers :D

For those in SA, I used http://www.takealot.co.za/ and not only did they have a good price for it, with their free delivery over R350, I didn't even have to pay for the courier service. And considering they ordered it from overseas it got here quite quick.


Monday, August 29, 2011

Ribbon cards

The following two cards were made for a ribbon theme:

Instruction:
Take a piece of cardstock of a color that fits in with the ribbons used. Since I used dark colors, I used a black piece of cardstock for the base.
Measure each piece of ribbon at least twice the length of the cardbase to make sure you have enough to create the folds.
Put a piece of double-sided tape down the whole length to start the first row. Remove the backing paper.
Lay your ribbon down on top of the tape, only on the edge, but let it overlap the edge by a bit so that it can be folded to the back.
I use my paper piercer which has a long sharp point and held it near the tape and then folded the ribbon over it, pressing the other end onto the tape. This creates the fold. Continue until you've made the folds where you want them. I didn't have folds all the way along the tape but varied their placement.
This sounded a bit confusing when I read this, so I went and took a photo to show you what I mean:

For the next row, put another piece of double-sided tape down the length and repeat the process.
For the sentiment row I cut TWO seperate pieces of ribbon and started them from each end, ending where I wanted the sentiment to go. The sentiment was stamped on a small piece of cardstock, the width of the ribbon. I put this in place on the double-sided tape.
The two ends of the ribbon ared folded back on themselves and adhered with glue-dots.
Once all the rows are completed, add the brads.
Now fold all the ribbon edges sticking out the sides to the back and adhere with double-sided tape to the back.
Adhere the front piece to your cardbase.

Sentiment from GinaK Designs: Fanciful Tags

For the second card, I used ribbons to make flowers:

There are two types of flowers here and here are the links to their instructions (so glad for very clever people out there who share their talents :D)
Back, light-blue flower: http://hopestudios.blogspot.com/2009/03/spring-bouquet-ribbon-flowers-two-ways.html
Front stripey flower:  http://lisapace.com/2007/04/ribbon-flower-tutorial/
For more ribbon flower ideas, see here: http://tipnut.com/ribbon-flowers/
I stuck the two flowers together using my glue gun.

Sentiment from GinaK Designs: Garden Silhouettes

Friday, August 26, 2011

CAS thank you

I'm back after a great holiday! And how nice it was to find my latest delivery from http://www.scrap-a-doodles.co.za/ waiting for me at home :D

I finally got my London Fog ink pad and I just love this color! I made this thank you card using London Fog and a stamp from GinaK Designs, Garden Silhouettes:

Tuesday, August 23, 2011

See you soon

We are wrapping up our holiday and God willing we'll be home tomorrow. Itching to get stamping!

God bless
Riƫtte

Tuesday, August 9, 2011

Lawnscaping Challenge #15: Distressing

I'm comfortable with CAS cards. Most often I feel better about my CAS cards than any other type (e.g. Vintage, Distress, etc). But I have to admit there's something therapeutic about rubbing or filing the heck out of a piece of paper.
This card is for the current Lawnscaping challenge: Distressing

The DP is from a Prima paperpack "Reflections" and this was distress by rubbing Tim Holtz Aged Mahogany over the edges but also flattening the pad to cross over onto the paper.
The grey Tim Holtz distress paper was filed with a nail file. I laid it flat on my working surface and filed the edges while holding the file pretty flat as well.
The plain white cardstock I used for the base was also distress using Aged Mahogany but I did go over with Antique Linen.
I cut the ribbon (I love this one from my local sewing shop) to fit the length of the card. I then picked at the edges until I unravelled a bit of it. I stuck double-sided tape along the edges on the back-side to catch it from unravelling further. The length was stuck down with double-sided tape as well.
The image and sentiment is from GinaK Designs "Garden Silhouettes" and I did shadow stamping again (my technique of choice this month it seems!). This image was layered on plain kraft.
See below for a close-up of the edges:

More Afrikaans sentiments

The sentiments page was updated with more Afrikaans sentiments. I added three commonly used ones and a lovely saying by our beloved C.J. Langenhoven. http://en.wikipedia.org/wiki/Cornelis_Jacobus_Langenhoven

Thursday, August 4, 2011

If you can't FIX it, FLAUNT it!

You know the saying, "if you can't fix it, flaunt it"? This can not be more true in the case of this card. For the current Monday challenge over at http://www.stamptv.com/, we had to "Break the Rules". You can check the link for the 'rules' we had to follow :D

What I wanted to show you is what I did when I tried to score only TWO lines at the top and sides. Because the card is 9" long (one of the rules we had to break was to get away from the standard size), and my Scor-Buddy is 6" long, the score line did of course not reach the bottom. When I also tried to turn the card the other way to score the other side, I had to guess how far from the top I had to start. Oh dear me, I got the score lines all wrong! So ....
... I made score lines at random lengths to get around it! I rubbed the scored sheet with distress ink to highlight the lines.

The other fault I had to hide is under the bow.  I forgot to put double-sided tape on top of the black ribbon when I put the green one down, so it lifted up a bit. I put a double-sided 3D dot in the middle under the green ribbon and LO and BEHOLD, you could see it stick out slightly. Aaaarrrgghhh. Therefore - a bow.

The sentiment (from GinaK Designs Garden Silhouettes), is stamped on back sheet of the card:
This is also the only way I could figure out how to adhere the back 9" sheet to the front. I guess this is how it's done...

Creating patterned paper with sponge dobbers

Here is my take on creating patterned paper using sponge dobbers.

I first dobbed all over the paper with my mini sponge dobbers, using Tim Holtz distress ink in Spun Sugar, Aged Mahogany and Crushed Olive:


I then used a foam applicator and rubbed Antique Linen all over the image to fade any open white areas.
I used Memento Rich Cocoa to stamp a bunch of flowers from GinaK Design's Enjoy the Sunshine over the background. And voila!
And here's the card I made with it for the Stamptv Friday challenge, Lazy Summer Days


Sentiments update

A new Afrikaans sentiment has been added on the sentiments page: http://redcardcorner.blogspot.com/p/sentiments.html

Super Give-away at Market Street Stamps (END THU 4 AUG)

Click here to play along in a super give-away at Market Street Stamps: http://marketstreetstamps.blogspot.com/2011/08/giveaway-posts-sale-info.html

Wednesday, August 3, 2011

Paper Only!

This August release challenge has us using ONLY PAPER on our cards. And I was SO HAPPY to receive my "Ladies Fashion Buckles" dies (Spellbinders) today! The 6 week wait was worth it. I cut the three buckles with black Bazzil Basics cardstock.

The background image was done using Spellbinders Impressabilities (see technique here).
The three strips of DP (really from my scraps collection) is from Desert Bloom (TrimCraft) and the middle one is from Prima paper.

The sentiment I stamped from GinaK designs' Enjoy the Sunshine (so worth getting this set!). It was cut using Spellbinders Labels 8 and then the top was cut off to nestle against the paper strip. It overlaps the one below it.

Gatefold with paper-scraps background

http://www.stamptv.com/ had a new Release day! Head on over to see what fabulous stamps sets are available.

For the release there are two challenges, and this is the Gatefold Card challenge.  I love these types of cards. They're really easy and very WOW.
The "DP" is actually created by glueing scraps of DP together on one piece of cardstock and then cut to size. There is some Dessert Bloom paperpack (TrimCraft) and Prima paperpacks (Melody and Reflections) in there :-D  See Gina's video on this technique here: http://stamptv.ning.com/video/using-your-scraps-part-1 (Note there is a part 2)

I wanted the focus to stay on the pretty background so kept the oval image very neutral. The stamp is from GinaK Designs Garden Silhouettes, stamped using the Shadow Stamping technique.

And this time I didn't leave the inside blank, but:

You're the Cherry

The following card is for two challenges:
1.  CPS #229 (layout at the bottom)
2.  Digital Pencil - Challenge #93: Something SWEET

I love this image!! It's me after I've discovered my way around the kitchen thanks to Julia Child! (http://redcuisine.blogspot.com/)
You can find the image <HERE> at Mo's shop.
The back DP is from "Me & My Big Ideas"
The top layer DP is from Desert Bloom paperpack (TrimCraft)
Black cardstock is Bazzil Basics

AND........

The sentiment is my OWN!!  See my NEW sentiments page.

CPS #229

Meljen's Challenge #69 - Frame IT!

This week's Meljen's challenge is to put something in a frame on our cards. I created a pink frame for the adorable ballerina (available HERE).

The pink frame was cut with two sizes Spellbinders Scalloped Circles Small. I wanted to pop the frame on top of the image with 3D dots but they stuck out so I ended up glueing it directly onto the image circle.

To see how to do the ribbon flower see here: http://lisapace.com/2007/04/ribbon-flower-tutorial/

The DP is from Desert Bloom paperpack from TrimCraft.
Pink cardstock is Bazzil Basics.

Snowboard Santa

I was looking for a cool image for a teenager and found this gem at Mo's Digital Pencil:  http://www.mosdigitalpencil.com/snowboard-sant...